If you are ready to take your modelling skills to the next level, then a recreation of a narrow-gauge railway is a...

Cart 0 Product Products (empty)
No products
Free shipping! Shipping
£ 0.00 Total
Product successfully added to your shopping cart
Quantity
Total
There are 0 items in your cart. There is 1 item in your cart.
Total products (tax incl.)
Total shipping (tax excl.) Free shipping!
Total (tax incl.)
Search Tips
Tips categories
Latest Tips
-
 How do I model a narrow-gauge railway in 00 gauge?Read more
 -
 What is TT:120 scale?Read more
TT:120 scale is a popular model railway scale and track gauge used by modellers in the UK and beyond. The 'TT' in...
-
 What are the BR Mk1 carriages liveries?Read more
We are willing to bet that at least 99.9% of modellers own at least one MK1 carriage amongst their collection. These...
-
 What advantages do starter or gift set models offer to a novice modelmaker?Read more
Starter or gift set models are a great option for novice modelmakers for several reasons. These sets are specifically...
-
 What advantages do servo motors have over solenoids for operating points and semaphore signals on a model railway layout?Read more
Servo motors offer several advantages over solenoids when it comes to operating points and semaphore signals on a...

Tips for smooth model railway track transitions
As any seasoned model railway enthusiast knows, achieving seamless track transitions is crucial for ensuring a realistic and reliable running experience on your layout. Nothing spoils the immersive illusion more than clunky track joints or unsightly gaps between sections. Fortunately, with a bit of careful planning and some simple techniques, you can create smooth, imperceptible transitions that will have your trains gliding effortlessly across your meticulously crafted landscape.
The first step is to pay close attention to the track laying process from the very beginning. Make sure your trackbed is perfectly level and secure before affixing any rails. Any unevenness or shifting in the foundation will inevitably lead to problems further down the line. Use a spirit level liberally to check for flatness and consider incorporating underlay or cork for added stability.
When it comes time to join individual pieces of track, take your time and exercise maximum precision. You may want to file down or file back the ends of the rails to achieve a perfectly flush join and use rail joiners for a tight, snug fit. For particularly tricky transitions, such as between different track scales or types, you may need to invest in specialty products like track alignment pins or insulated rail joiners.
Don't neglect the visual elements, either. Carefully ballast the track and landscape the surrounding terrain to visually integrate the different sections. Blend in any track gaps with realistic ground cover and use strategic plantings or other scenic elements to draw the eye away from potential transition points. With a bit of artistry, you can create the illusion of a single, continuous stretch of weathered railway cutting through your model landscape.
Maintain a vigilant eye for any issues that may arise and address them promptly. Regularly inspect your track for signs of wear or misalignment and be ready to make adjustments as needed. A little preventative maintenance now can save you from derailments and other frustrations down the road (or should we say "down the track"?)
Posted in: Tracks
Click here to receive the tips weekly in your mailbox. You can unsubscribe at any time.
Related products

Streamline OO/HO Transition Track Code 83/Code 70
Price: £ 12.50Streamline OO/HO Transition Track Code 83/Code 70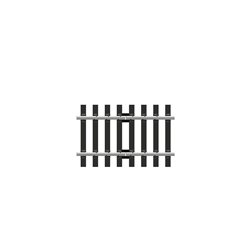
Streamline OO/HO Transition Track Code 83/Code 100
Price: £ 12.50Streamline OO/HO Transition Track Code 83/Code 100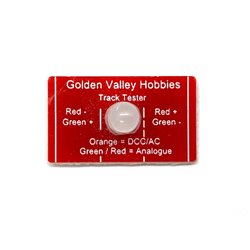
Multi gauge track tester for OO, HO, TT and N
Price: £ 5.50Multi gauge track tester for OO, HO, TT and N
Related posts
-
 How to clean model railways track?There is of course the old tried and tested method, the track rubber which does the job, no railway modeller should...
 - Is Peco track and Hornby track compatible?Peco Setrack and Peco Streamline are compatible with Hornby track as they all share the same gauge width of 16.5mm....
- How often should I clean my track?This a hard question to answer. There are no hard and fast rules about how often you should clean the track. Bear in...
- How do I cut flexible track?Once upon a time I would have said a newly bladed junior hacksaw and some warding files, but these days I would have...
- How many pieces of curved track do I need to make a circle?As we all know it takes 360 degrees to create a circle, a standard curve is 22.5 degrees and a double curve is 45...