Paint not only comes in different types (acrylic or enamel) but will also produce different finishes. These different...

Cart 0 Product Products (empty)
No products
Free shipping! Shipping
£ 0.00 Total
Product successfully added to your shopping cart
Quantity
Total
There are 0 items in your cart. There is 1 item in your cart.
Total products (tax incl.)
Total shipping (tax excl.) Free shipping!
Total (tax incl.)
Search Tips
Tips categories
Latest Tips
-
 What finish should I use on my model: matt, satin or gloss?Read more
 -
 What are the main advantages of using a spray booth?Read more
A spray booth is a very useful tool for any regular airbrush user. An airbrush will use air pressure to atomise paint...
-
 What different types of layout are there?Read more
There are many ways in which you can construct your layout, there are several common types that have names you might...
-
 Is DCC better than analogue?Read more
This is really a matter of personal choice and what you want to get out of your model railway. There is a lot to be...
-
 How do I clean the wheels of my engine?Read more
One easy way is to get yourself a Peco cleaning kit containing a wire brush, wheel scraper, foam cradle and oil. The...

How can I safely remove ejector pin marks from model parts without damaging them?
Ejector pin marks are distinctive, consistently sized circular effects that can appear on the surface of model parts. These are an inevitable part of the manufacturing process used by manufacturers to help eject plastic sprues and other parts from the moulding machines. The resultant ejector pin marks can be either recessed into or protruded from the surface of the plastic. Most modern manufacturers will go to considerable lengths to hide these marks as they can severely detract from surface details and spoil the overall effect for the modeller. As such the marks are located on the underside of a part or other locations that will not be visible when the model is complete.
Unfortunately, it is not always possible to hide these pin marks. Additionally, many older or vintage models utilised older, less sophisticated moulding technology that was not able to conceal these marks. This inevitably leaves the modeller with a conundrum. To either, A. ignore them, or, B. attempt to remove them. In some cases, A. may be the most practical approach, especially where the offending marks are not easily visible. On other occasions, due to the sheer number of marks in obvious locations, B. becomes the most desirable option.
Raised marks are best removed with a combination of a sanding stick and a hobby knife. Where the marks are relatively low then a sanding stick may be the most practical option. Start with a fairly coarse grade and gently work down, being careful not to damage the surface. Once closer to the surface a very fine-grain sander can be used followed by a polishing stick. Hobby knives can be used to whittle down more prominent marks, although care should be exercised to avoid damage to the surface.
Recessed marks can be filled in with modelling putty, the shape of the mark may offer assistance in placing the putty. Any excess putty can then be removed by a process of sanding and polishing to the desired level.
Posted in: Assembling and gluing
Click here to receive the tips weekly in your mailbox. You can unsubscribe at any time.
Related products
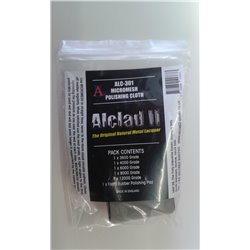
DISC**Alclad II Micromesh Polishing Cloth set
Price: £ 13.50Alclad II Micromesh Polishing Cloth set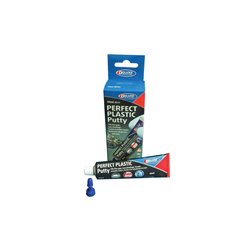
Perfect Plastic Putty (40ml)
Price: £ 8.75Perfect Plastic Putty (40ml) Deluxe Materials Perfect Plastic Putty is a...
Related posts
-
 Do I need to wash my plastic kit?I personally wash all my plastic kits, I use warm soapy water (Washing up liquid) and a light rub over with a nail...
 - What is Milliput?Milliput is a two-part epoxy putty. There are two different colour rolls in a box when these are mixed together it...
- What modelling tools do I need to get started?Most modellers have an extensive tool kit, a tool for every eventuality. But when first starting a scalpel or a...
- How do I remove parts from the sprue?The short answer is carefully. The best way is with a sprue and plastic cutter but always be mindful of exactly...
- Do I need a cutting mat?It is not essential to have a cutting mat, but it is a good idea. It saves getting in trouble with your significant...