There are several glues out there on the market for gluing plastic kits. The most commonly used would have to be a...

Cart 0 Product Products (empty)
No products
Free shipping! Shipping
£ 0.00 Total
Product successfully added to your shopping cart
Quantity
Total
There are 0 items in your cart. There is 1 item in your cart.
Total products (tax incl.)
Total shipping (tax excl.) Free shipping!
Total (tax incl.)
Search Tips
Tips categories
Latest Tips
-
 How do I glue plastic models?Read more
 -
 What are supplementary arrow signs in railways?Read more
'Supplementary arrow signs' are the arrows that can be seen just beneath some signals or signage such as speed limits...
-
 How can I best clean my brushes after using enamel-based paints?Read more
Cleaning brushes after using enamel-based paints can be a bit trickier than cleaning them after using water-based...
-
 What is a "third hand" tool?Read more
A third hand tool (often referred to as a helping hand tool) is a clamp like device that sits on your worktop. Its...
-
 How do I fix warped plastic parts?Read more
Fixing warped plastic parts on a model can be a bit tricky, but it's a manageable task with some patience and the...

How can I create sandbags for a diorama?
Sandbags can be a very useful addition to a layout or diorama and can be relatively easy to achieve. Although it is possible to purchase aftermarket resin or plastic sandbags to enhance a kit, these items may not necessarily be the most appropriate scale for the model. Additionally, they may not be shaped or configured in such a way that would naturally lend itself to a layout or diorama.
Luckily, there is a quick and simple alternative available to modellers for them to create their own sandbags that are both scaled and shaped accordingly. Two-part epoxy is readily available from most hobby shops or hardware stores and lends itself well to creating sandbags. Simply mix the epoxy as per the manufacturer's guidance and then roll it into a long thin tube. This can then be gently flattened to create appropriately scaled contours for the sandbags. Whilst still pliable, the epoxy can be cut into suitable lengths using a hobby knife and given any final shaping tweaks as required.
An old toothbrush can be used at this stage to gently apply stippling effects to the sandbags once they are in place. Once dry, the sandbags can be painted as required. They also lend themselves well to other weathering effects such as washes and weathering powders to help develop depth and integrate the sandbags into the layout or diorama. Why not try this technique on your next project?
Posted in: Assembling and gluing
Click here to receive the tips weekly in your mailbox. You can unsubscribe at any time.
Related product
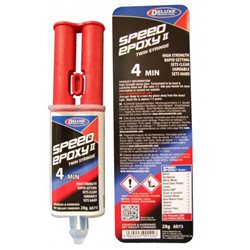
DISC**Speed Epoxy II (28g Syringe)
Price: £ 9.50Speed Epoxy II - Twin syringe (28g) High Strength epoxy glue.
Related posts
-
 Do I need to wash my plastic kit?I personally wash all my plastic kits, I use warm soapy water (Washing up liquid) and a light rub over with a nail...
 - What is Milliput?Milliput is a two-part epoxy putty. There are two different colour rolls in a box when these are mixed together it...
- What modelling tools do I need to get started?Most modellers have an extensive tool kit, a tool for every eventuality. But when first starting a scalpel or a...
- How do I remove parts from the sprue?The short answer is carefully. The best way is with a sprue and plastic cutter but always be mindful of exactly...
- Do I need a cutting mat?It is not essential to have a cutting mat, but it is a good idea. It saves getting in trouble with your significant...