For anybody who doesn't know the difference, code 100 track is the standard OO gauge model railway track. Code 75...

Cart 0 Product Products (empty)
No products
Free shipping! Shipping
£ 0.00 Total
Product successfully added to your shopping cart
Quantity
Total
There are 0 items in your cart. There is 1 item in your cart.
Total products (tax incl.)
Total shipping (tax excl.) Free shipping!
Total (tax incl.)
Search Tips
Tips categories
Latest Tips
-
 Can I mix code 100 and code 75 track sizes?Read more
 -
 Are Peco points compatible with Hornby track?Read more
All Peco track is compatible with Hornby track. You can mix and match as much as you want. It means you can use Peco...
-
 What are the best options for cutting tracks?Read more
Inevitably there will be times when a modeller will need to cut sections of a track when creating a layout. For those...
-
 What is a Diorama?Read more
A diorama is three-dimensional scene creating a moment in time, this could be a historical event or a fictional one,...
-
 What is the difference between gauge and scale?Read more
The dictionary defines gauge as "the distance between the two rails on a railway line" and scale as "the scale of a...

How can I keep parts in place during gluing?
When gluing parts, it is best to hold them in place especially if it is a large area you need to join together, such as the two parts of a fuselage of a model aircraft for example.
Add your glue sparingly to the joins, taking care not to go too close to the outer edge as when the two parts are put together the glue will spread to the edge. Too much glue and the glue will spill out and when dry will leave unsightly overspill.
Masking tape is ideal for holding the two pieces together. When you offer up the two parts make sure that they align perfectly. Then add the masking tape to secure. When securing the tail fin or wings use small clamps as the two areas are relatively flat.
Leave the glue to dry and then remove tape and clamps for a perfect finish.
Click here to receive the tips weekly in your mailbox. You can unsubscribe at any time.
Related products
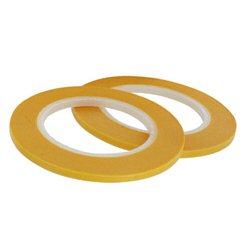
Precision Masking Tape 3mm x 18m - Twin pack
Price: £ 2.95Precision Masking Tape 3mm x 18m - Twin pack Use precision masking tape from...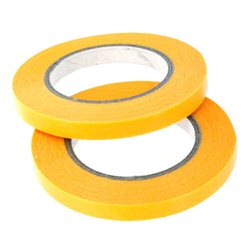
Precision Masking Tape 6mm x 18m - Twin pack
Price: £ 3.25Precision Masking Tape 6mm x 18m - Twin pack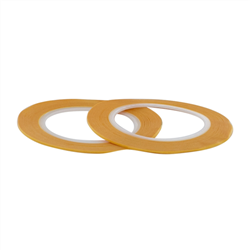
Precision Masking Tape 1mm x 18m - Twin pack
Price: £ 2.30Precision Masking Tape 1mm x 18m - Twin pack
Related posts
-
 Do I need to wash my plastic kit?I personally wash all my plastic kits, I use warm soapy water (Washing up liquid) and a light rub over with a nail...
 - What is Milliput?Milliput is a two-part epoxy putty. There are two different colour rolls in a box when these are mixed together it...
- What modelling tools do I need to get started?Most modellers have an extensive tool kit, a tool for every eventuality. But when first starting a scalpel or a...
- How do I remove parts from the sprue?The short answer is carefully. The best way is with a sprue and plastic cutter but always be mindful of exactly...
- Do I need a cutting mat?It is not essential to have a cutting mat, but it is a good idea. It saves getting in trouble with your significant...