Deciding where to place signals on a model railway layout can be extremely confusing as there are many rules to...

Cart 0 Product Products (empty)
No products
Free shipping! Shipping
£ 0.00 Total
Product successfully added to your shopping cart
Quantity
Total
There are 0 items in your cart. There is 1 item in your cart.
Total products (tax incl.)
Total shipping (tax excl.) Free shipping!
Total (tax incl.)
Search Tips
Tips categories
Latest Tips
-
 How can I learn where to place my signals?Read more
 -
 How to use a track gauge like Peco SL-36 and SL-336?Read more
Track gauges of this type don't look like much when you take them out of the box and it's often hard to see how to...
-
 How can I add panel lines to a scale model?Read more
A lot of modellers like to add detail to their models. One of the things you can do to add realism to your model is...
-
 How do I increase pulling power on gradients?Read more
There are several ways to improve traction on those steep gradients. Below are a few ways to try. Consist: This...
-
 How do I paint a white metal kit?Read more
Painting a white metal kit involves pretty much the same processes as painting any model, or a real-life metal object...

How can I stop the glue from spilling out from the joints on a plastic model?
The main problem, which we have all been guilty of at one time or another is using too much glue.
The secret is: "you don't need very much glue".
When it comes to applying the glue to the model, try using a cocktail stick/tooth pick or a syringe. Use just a small amount of glue on the tip of a stick and run it along the edge of the seam that is to be glued. Do not take the glue to the very edge that is going to be on show as when the two pieces are joined together the glue will fill up to that edge. This should stop any unsightly glue lines along the seams.
If you still have glue residue leaking from the seam use a warm wet cloth to wipe the glue away while it is still wet.
This technique should work regardless of what glue you are using and what it is you are gluing.
Just remember that when you join two parts together with glue, that the glue has to go somewhere so use sparingly.
Click here to receive the tips weekly in your mailbox. You can unsubscribe at any time.
Related products
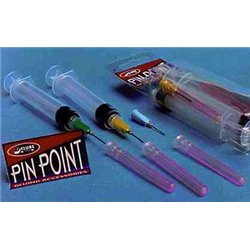

Set of 3 Ultra Fine Metcalfe Glue Applicator...
Price: £ 5.50Set of 3 Ultra Fine Metcalfe Glue Applicator Bottles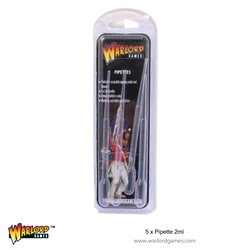
DISC**DISC************Warlord Tools - 2ml...
Price: £ 3.00Warlord Tools - 2ml Pipette (5) These pipettes are ideal for accurately...
Related posts
-
 Do I need to wash my plastic kit?I personally wash all my plastic kits, I use warm soapy water (Washing up liquid) and a light rub over with a nail...
 - What is Milliput?Milliput is a two-part epoxy putty. There are two different colour rolls in a box when these are mixed together it...
- What modelling tools do I need to get started?Most modellers have an extensive tool kit, a tool for every eventuality. But when first starting a scalpel or a...
- How do I remove parts from the sprue?The short answer is carefully. The best way is with a sprue and plastic cutter but always be mindful of exactly...
- Do I need a cutting mat?It is not essential to have a cutting mat, but it is a good idea. It saves getting in trouble with your significant...