Departmental rolling stock is great for modellers. Often it is an excellent excuse to run much earlier locomotives...

Cart 0 Product Products (empty)
No products
Free shipping! Shipping
£ 0.00 Total
Product successfully added to your shopping cart
Quantity
Total
There are 0 items in your cart. There is 1 item in your cart.
Total products (tax incl.)
Total shipping (tax excl.) Free shipping!
Total (tax incl.)
Search Tips
Tips categories
Latest Tips
-
 What is departmental stock?Read more
 -
 What is a bubble car?Read more
Bubble cars were a single-unit first generation DMU built by British Rail in the late 1950s and 1960. Because they...
-
 What type of oil should I use in a smoke generator?Read more
As the topic of "What type of oil should I use in a smoke generator?" involves mixing oil, heat, electric and your...
-
 Can I use HO gauge figures on an OO scale layout?Read more
Yes, you can use HO figures on your OO scale layout, there is a slight difference in size, but this is negligible in...
-
 Are surface mounted point motors better than under the baseboard ones?Read more
There is no one-size-fits-all answer to this question, as the choice between surface-mounted and under-baseboard...

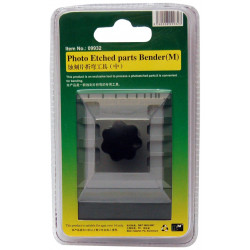
How can I add a curve to a Photo Etch part without damaging it?
Photo-Etch, sometimes referred to as PE parts are thin brass parts that allow small or fine detail components to be produced more faithfully to scale than would be possible with resin or styrene components. These parts can be added to a model providing significant detail that can really enhance the end result into a truly eye-catching piece. Unfortunately, the flip side of the coin is that PE parts are very fragile and can be easily damaged if incorrectly handled.
Another factor to take into account with PE parts is that they are manufactured flat. In most cases, this is not an issue. However, when the part needs to be shaped or curved this can be a problem as having the wrong shape can easily detract from the end result, effectively rendering the PE part as counter-productive to the intended result.
One example of this issue is radar antennas for model ships. Inevitably, most radar dishes are parabolic in shape. Achieving this shaping is down to the modeller. Luckily there is a simple technique that can add a curve to a PE part without risking damage. To start, take the part that is to be curved and cut it out and place it on a firm and flat surface. Then, take a paintbrush or other implement that has a curved surface and gently but firmly roll it from side to side across the part, ideally perpendicular to the PE part. This motion will imbue the part with the desired curve. One advantage of this approach is that the shaping is built up gradually and so is relatively easy to control. Sometimes with certain parts, there may be a requirement to add curves in both horizontal and vertical planes. This can easily be achieved with the same technique by gently alternating the direction of the roll applied by the rolling implement.
Although in this example we have examined the requirement to shape a radar dish, the same principle can be similarly utilised to shape or contour a wide range of other PE parts with a variety of contours or curves according to need. Why not give this technique a try on your next PE-based project?
Posted in: Kit building
Click here to receive the tips weekly in your mailbox. You can unsubscribe at any time.
Related products
Related posts
-
 Do I need to wash my plastic kit?I personally wash all my plastic kits, I use warm soapy water (Washing up liquid) and a light rub over with a nail...
 - What is Milliput?Milliput is a two-part epoxy putty. There are two different colour rolls in a box when these are mixed together it...
- What modelling tools do I need to get started?Most modellers have an extensive tool kit, a tool for every eventuality. But when first starting a scalpel or a...
- How do I remove parts from the sprue?The short answer is carefully. The best way is with a sprue and plastic cutter but always be mindful of exactly...
- Do I need a cutting mat?It is not essential to have a cutting mat, but it is a good idea. It saves getting in trouble with your significant...